Golf cart brakes don't get nearly enough attention until something goes wrong — and by then, you're already dealing with a cart that pulls to one side, takes forever to stop, or has a pedal that sinks to the floor. The good news is that adjusting drum brakes (the most common setup on golf carts) is a straightforward job you can do at home with basic tools. Hydraulic disc brakes add a bleeding step, but the process is still well within DIY territory. Here's how to work through both situations correctly.
Understand What Type of Brakes You Have
Most golf carts — particularly older EZGO, Club Car, and Yamaha models — use mechanical drum brakes actuated by a cable. When you press the brake pedal, the cable pulls a lever that forces brake shoes outward against the inside of a spinning drum. Over time, the shoes wear down, the cable stretches, and the effective braking distance grows. Some newer or upgraded carts use hydraulic disc brakes, which use fluid pressure instead of a cable to clamp brake pads against a rotor. Identifying your system before you start saves time and ensures you're solving the right problem.
Safety First: Secure the Cart Before You Start
Before touching any brake component, park the cart on a flat, level surface and block the wheels that will remain on the ground. If you're lifting one end of the cart to access the rear brakes, use proper jack stands — never rely on a floor jack alone to hold the weight. Disconnect the battery or, on gas carts, pull the spark plug wire. Brakes are a safety-critical system, and a cart that rolls unexpectedly while you're underneath it is a serious hazard.
How to Adjust Mechanical (Cable-Actuated) Drum Brakes
Start at the cable adjuster, which is typically located near the brake pedal assembly or along the cable run itself. Loosen the jam nut on the adjuster and tighten the cable incrementally — a little goes a long way here. You're looking for the pedal to feel firm and engage well before it bottoms out, without the shoes dragging against the drum when the pedal is fully released. After each adjustment, spin the wheel by hand to confirm there's no constant rubbing. If one rear wheel drags and the other doesn't, the shoes may be worn unevenly or the self-adjuster inside the drum (if equipped) may be seized. In that case, you'll need to pull the drum and inspect the shoes directly. As a general rule, if the lining thickness on your brake shoes has worn down to a thin layer, replace them — adjustment can only compensate so much for worn friction material.
Adjusting the Shoes Inside the Drum
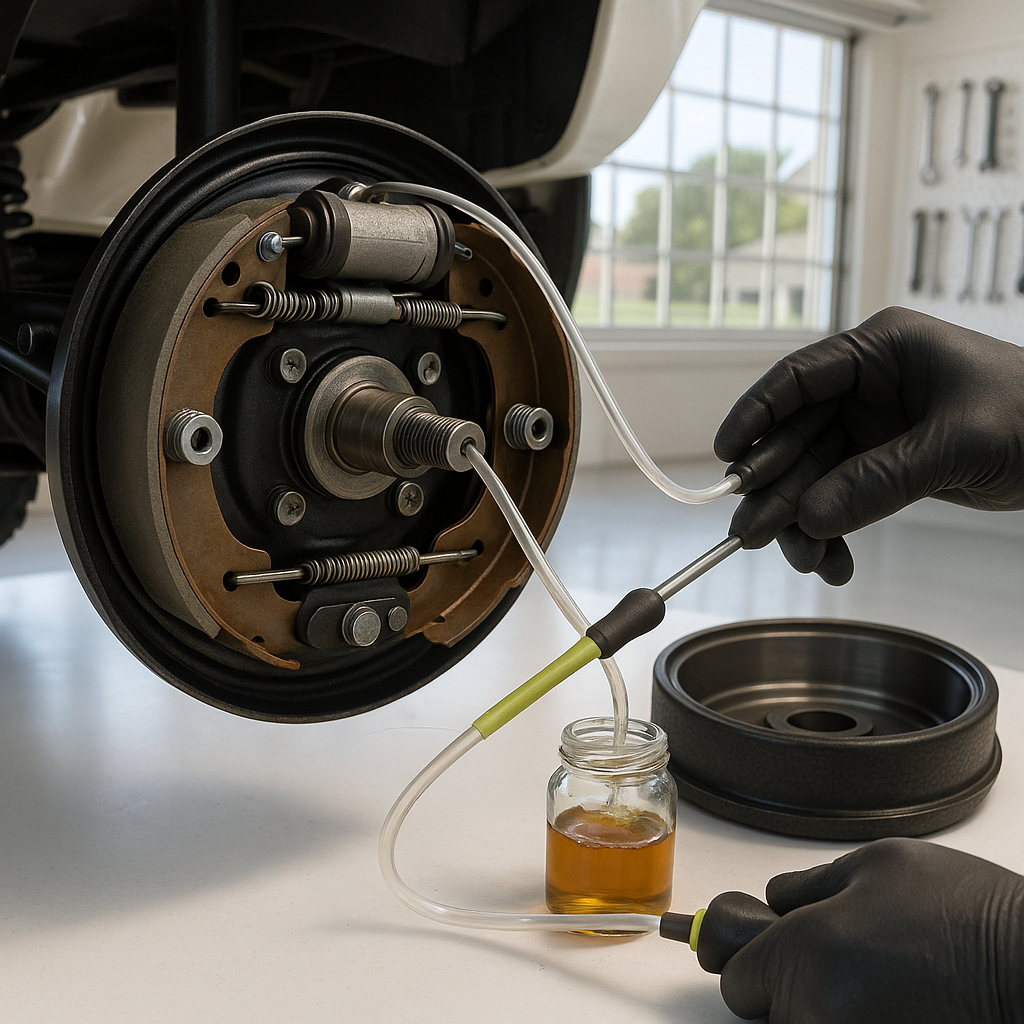
On carts that allow manual shoe adjustment inside the drum, remove the wheel and drum first. With the drum off, you'll see the two curved brake shoes held against a backing plate by return springs. There's typically a star wheel adjuster between the shoes near the bottom. Use a brake spoon or a flathead screwdriver through the adjustment slot (if the backing plate has one) to turn the star wheel and expand the shoes outward. Expand them until the drum just barely slides on with light resistance, then back off a few clicks until it spins freely. This sets the correct running clearance. Reinstall the drum and wheel, then check cable tension from the outside.
How to Bleed Hydraulic Disc Brakes
If your cart has hydraulic brakes and the pedal feels spongy or soft, there's likely air in the brake lines. Bleeding removes that air. Start by checking the master cylinder reservoir — it should be filled to the correct level with the brake fluid type specified for your system (check the reservoir cap or your cart's documentation; never mix fluid types). The bleeding process works from the caliper farthest from the master cylinder first, then works inward. Attach a clear plastic hose to the bleeder valve on the caliper and run the other end into a small jar with a bit of brake fluid in it (this prevents air from being sucked back in). Have a helper slowly press and hold the brake pedal, then open the bleeder valve a quarter turn — fluid and air bubbles will push out. Close the valve before your helper releases the pedal. Repeat until only clean, bubble-free fluid comes out. Top off the reservoir as you go; letting it run dry introduces more air. Work through each caliper the same way.
Test Before You Drive
Once you've completed your adjustment or bleed, pump the brake pedal a few times before moving the cart. On drum brake carts this seats the shoes; on hydraulic systems it confirms pressure has built correctly. Push the pedal firmly — it should feel solid and consistent, not mushy or variable. Do a slow test stop in a safe open area before returning the cart to normal use. If the pedal still sinks, the cart pulls noticeably to one side, or you hear grinding, stop and inspect further. Grinding almost always means metal-on-metal contact, which means the friction material is gone and you need new shoes or pads immediately.
How Often Should You Check Golf Cart Brakes?
For a cart used regularly on a course or around a community, a brake inspection once or twice a season is reasonable — more often if the cart hauls cargo, operates on hilly terrain, or sees heavy use. Cable-actuated brakes benefit from a light application of cable lubricant at the adjuster and any exposed cable sections to prevent rust and stiffness. Hydraulic systems should have fluid checked at the same interval, and a full fluid flush every few years keeps seals in good condition. Catching a worn shoe or a fraying cable early is always cheaper and safer than dealing with a brake failure mid-ride.


