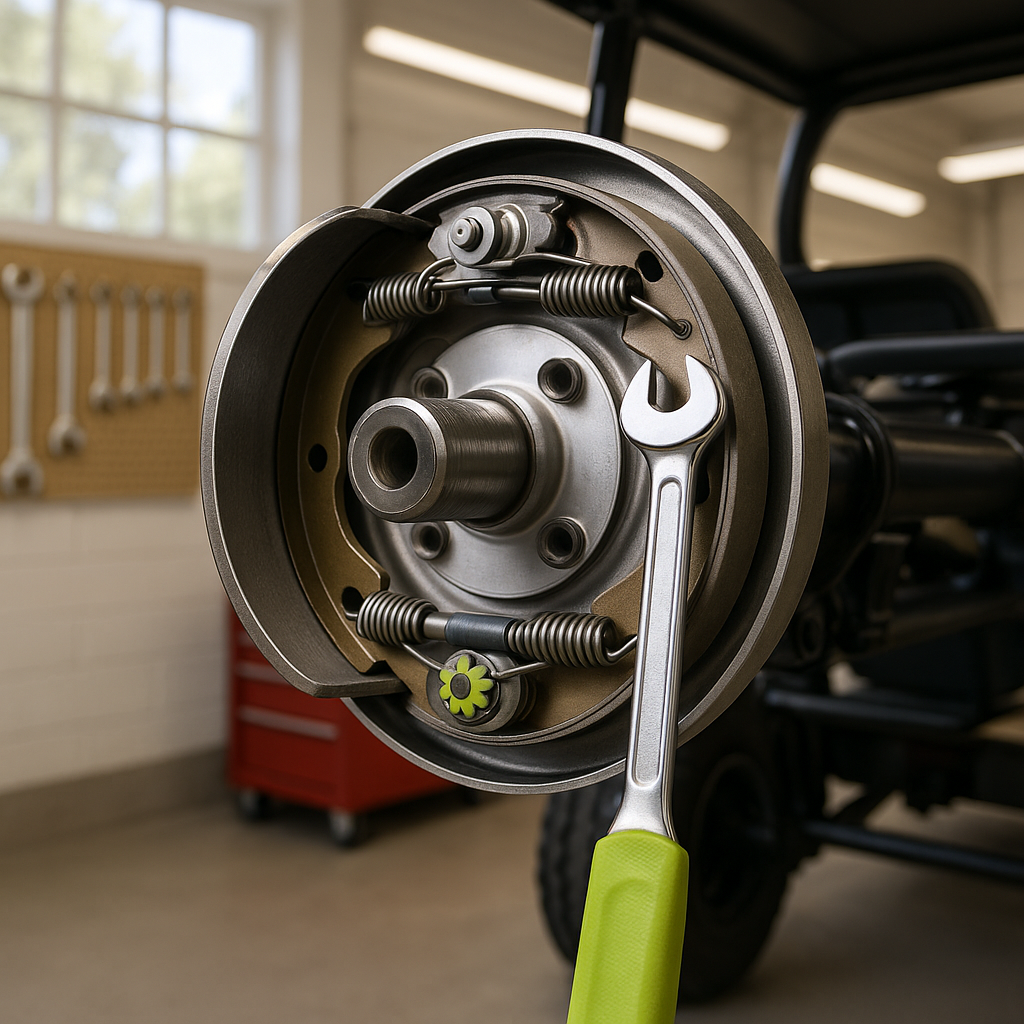
Drum brakes are the most common braking setup on older and many current golf carts, found on EZGO, Club Car, and Yamaha models alike. Unlike disc brakes, drum brakes are a self-contained system where curved brake shoes press outward against the inside of a spinning drum to create friction and slow the cart. The catch: the shoes wear down gradually, and the gap between shoe and drum grows until you're pressing harder and harder on the pedal for the same stopping force. Regular adjustment closes that gap back down and restores the firm, responsive feel brakes are supposed to have.
Signs Your Drum Brakes Need Adjustment
The most obvious sign is a soft or spongy brake pedal that travels farther than it used to before the cart actually slows. You might also notice the cart pulling to one side under braking, which usually means one side has adjusted unevenly or a shoe is wearing faster than the other. A grinding or scraping noise from the wheel area can mean the shoes are worn well past the point of adjustment and need replacement instead. If you can physically rock the rear wheels with your hands while the cart is parked and the brake is applied, the slack is overdue to be corrected.
What You'll Need
Drum brake adjustment is one of the more accessible maintenance jobs on a golf cart. In most cases you'll need a floor jack and jack stands rated for the weight of your cart, a lug wrench or socket set to pull the wheel, and a flathead screwdriver or a dedicated brake spoon tool to turn the adjuster star wheel inside the drum. Having a wire brush on hand to clean rust and debris off the adjuster is worth it — a frozen star wheel is the most common reason the job becomes a headache. Penetrating oil applied well before you start helps significantly if the cart has been sitting or lives in a humid environment.
Step-by-Step: Adjusting Drum Brakes
Start by safely lifting and supporting the cart at the rear axle — never rely on a floor jack alone to hold weight while you work. Remove the wheel to access the drum. If the drum slides straight off the hub, great. If it's stuck from rust or heat, work it loose evenly with light taps from a rubber mallet — avoid hitting the drum hard on one side, which can crack it. With the drum off, inspect the brake shoes visually. If the friction lining looks thin, glazed, or contaminated with grease, adjustment alone won't fix your problem and shoes should be replaced before you go further. Assuming the shoes look serviceable, locate the adjuster — it's typically a star wheel or threaded mechanism at the bottom of the brake assembly. Use your screwdriver or brake spoon to turn the adjuster, expanding the shoes outward. Reinstall the drum and spin it by hand as you adjust: you want the shoes to just barely drag against the drum with light resistance, not bind. When you've got that feel, reinstall the wheel, torque the lug nuts in a cross pattern to the spec in your cart's service manual, and lower the cart.
Checking Adjustment and Balancing Both Sides
After adjusting, always test both rear wheels for equal drag before taking the cart out. Lift both wheels off the ground and spin each by hand — they should feel roughly the same. A significant difference in resistance between sides means one brake is tighter than the other, which will cause pulling and uneven wear. Go back and fine-tune the looser side. Once on the ground, test brake pedal feel in a safe, open area at slow speed before returning to normal use. The pedal should engage firmly and the cart should stop straight without veering.
When Adjustment Isn't Enough
Drum brake adjustment has limits. If the shoes are worn down to or near the metal backing, or if the drum surface has deep scoring, grooves, or is out of round, no amount of adjustment will give you reliable stopping power. Drums that are below minimum thickness (usually stamped on the drum itself or listed in your service manual) should be replaced, not resurfaced. Similarly, if you find oil or grease inside the drum — from a leaking axle seal — that contamination has soaked into the shoe lining and the shoes must be replaced regardless of remaining thickness. Trying to adjust your way around these problems creates a false sense of security and is a genuine safety risk.
Drum brake adjustment is a straightforward maintenance task that most cart owners can handle with basic tools and a methodical approach. Do it whenever pedal feel softens noticeably, or as part of your annual maintenance routine. Consistent upkeep here pays off in predictable stopping performance and longer shoe and drum life.


