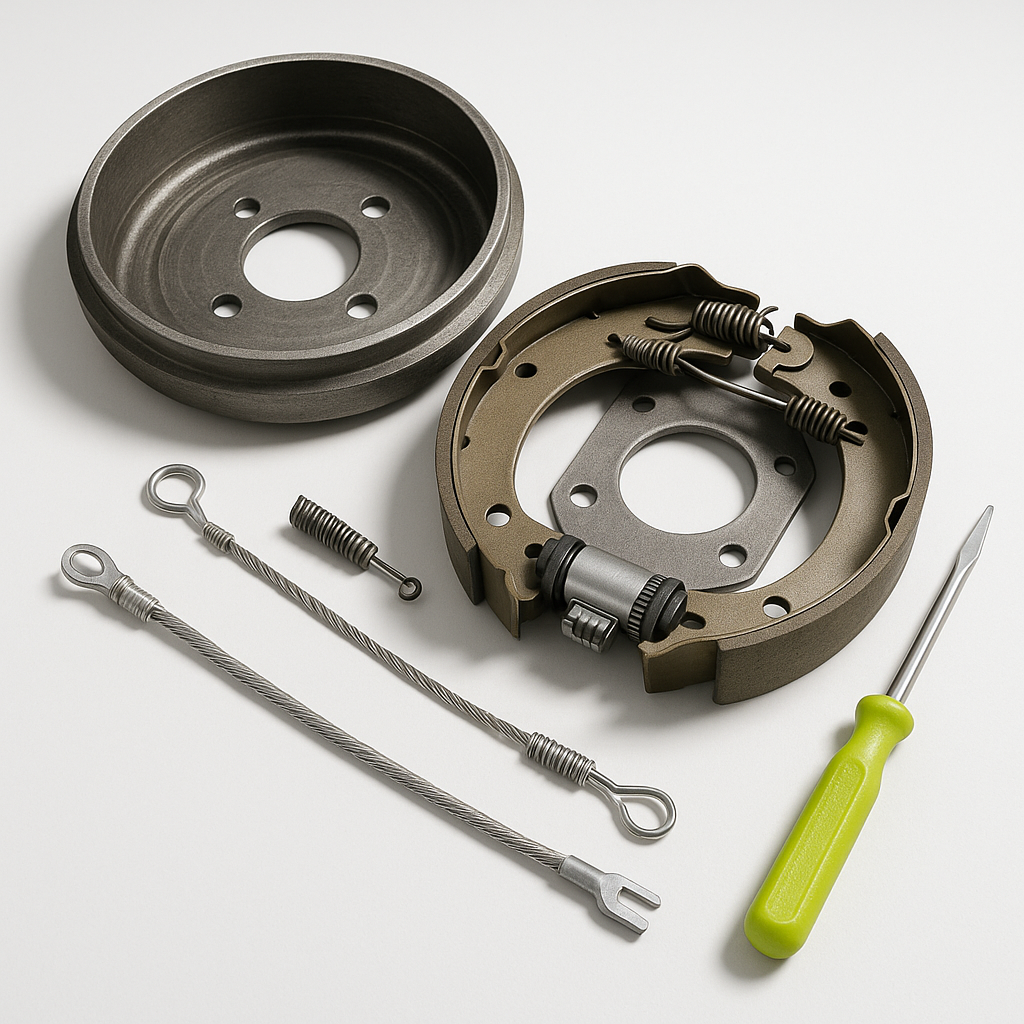
Most golf carts — especially older EZGO, Club Car, and Yamaha models — use a mechanical drum brake system operated by a cable connected to the brake pedal. Unlike hydraulic disc brakes on a car, these systems are simple and reliable, but they do require periodic adjustment as cables stretch, brake shoes wear down, and hardware loosens over time. If your cart is taking longer to stop, the pedal is pressing closer to the floor than usual, or the cart rolls on flat ground when it should hold, adjustment is the first thing to check before replacing any parts.
Understand What You're Adjusting
A typical golf cart drum brake system has two main adjustment points: the brake cable tension and the brake shoe clearance inside the drum itself. The brake cable runs from the pedal assembly to an equalizer or directly to the wheel assemblies. As the cable stretches with use, pedal travel increases and braking force at the wheel decreases. Separately, as brake shoes wear, the gap between the shoe lining and the drum surface grows, which also increases pedal travel. A proper adjustment addresses both. Before you start, understand which system you're dealing with — some carts use a single cable running to a rear equalizer bar, while others use separate left and right cables. Knowing your layout will make the job faster and help you avoid over-tightening one side.
Safety First
Always work with the cart powered off and the key removed. On electric carts, disconnect the battery pack or at minimum engage the tow/maintenance switch if your cart has one. Place wheel chocks in front of the front wheels before raising the rear. If you're adjusting the brakes with the wheels on the ground, make sure you're on a flat, level surface. Never work under a lifted cart supported only by a floor jack — use proper jack stands.
Check and Adjust Cable Tension
Locate the brake cable adjustment point — on most carts this is a threaded adjuster nut near the equalizer bar under the cart or near the brake actuating arm at the wheel. Before adjusting, press the brake pedal by hand and observe how much freeplay exists before you feel resistance. Most manufacturers recommend a small amount of freeplay — typically a short, firm travel before braking begins — but you should not have to press the pedal most of the way down before the cart slows noticeably. To reduce cable slack, tighten the adjuster nut incrementally, checking pedal feel as you go. Work in small increments. Over-tightening the cable can cause the brakes to drag, which creates excessive heat, premature shoe wear, and resistance when driving. After adjusting, push the cart by hand on flat ground with the brake released — it should roll freely with no dragging.
Adjust the Brake Shoes (If Equipped with an Adjuster)
Many drum brake assemblies include a star wheel adjuster — a toothed wheel visible through a small slot or opening in the backing plate or drum. With the wheel removed (or on some carts, accessible from behind the drum), use a brake spoon or flat screwdriver to rotate the star wheel and expand the shoes outward toward the drum surface. Turn it until the drum becomes difficult to spin by hand, then back off just enough that the drum rotates freely with only slight resistance. This sets the shoe-to-drum clearance correctly. Not all golf cart drum brake designs use an accessible star wheel — some rely entirely on cable adjustment — so inspect your specific setup before assuming one is present.
Reassemble, Test, and Verify
Once adjustments are made, reinstall any covers or wheels you removed and torque lug nuts to spec. Lower the cart to the ground and perform a slow, controlled brake test in a safe, open area. Press the pedal firmly and check that the cart stops evenly — it should not pull to one side, which can indicate uneven adjustment between left and right rear brakes. Also listen for any grinding or scraping sounds, which can mean a shoe is contacting the drum at rest (over-adjusted cable) or that a shoe is worn down to bare metal (time to replace, not just adjust). If adjustments don't restore solid, consistent braking feel, inspect the shoes for wear and the cable for fraying, corrosion, or kinks that prevent smooth operation.
How Often to Adjust
How frequently you need to adjust depends heavily on how much you use the cart and on what terrain. A cart used daily on hilly ground will need more frequent attention than one used occasionally on flat grass. A good rule of thumb is to check brake pedal feel every few months as part of routine maintenance, and to inspect cables and hardware at least once a year. Cables that show visible fraying, stiff spots, or corrosion along their length should be replaced rather than adjusted — no amount of tightening will compensate for a compromised cable, and a failed brake cable mid-ride is a genuine safety hazard.


