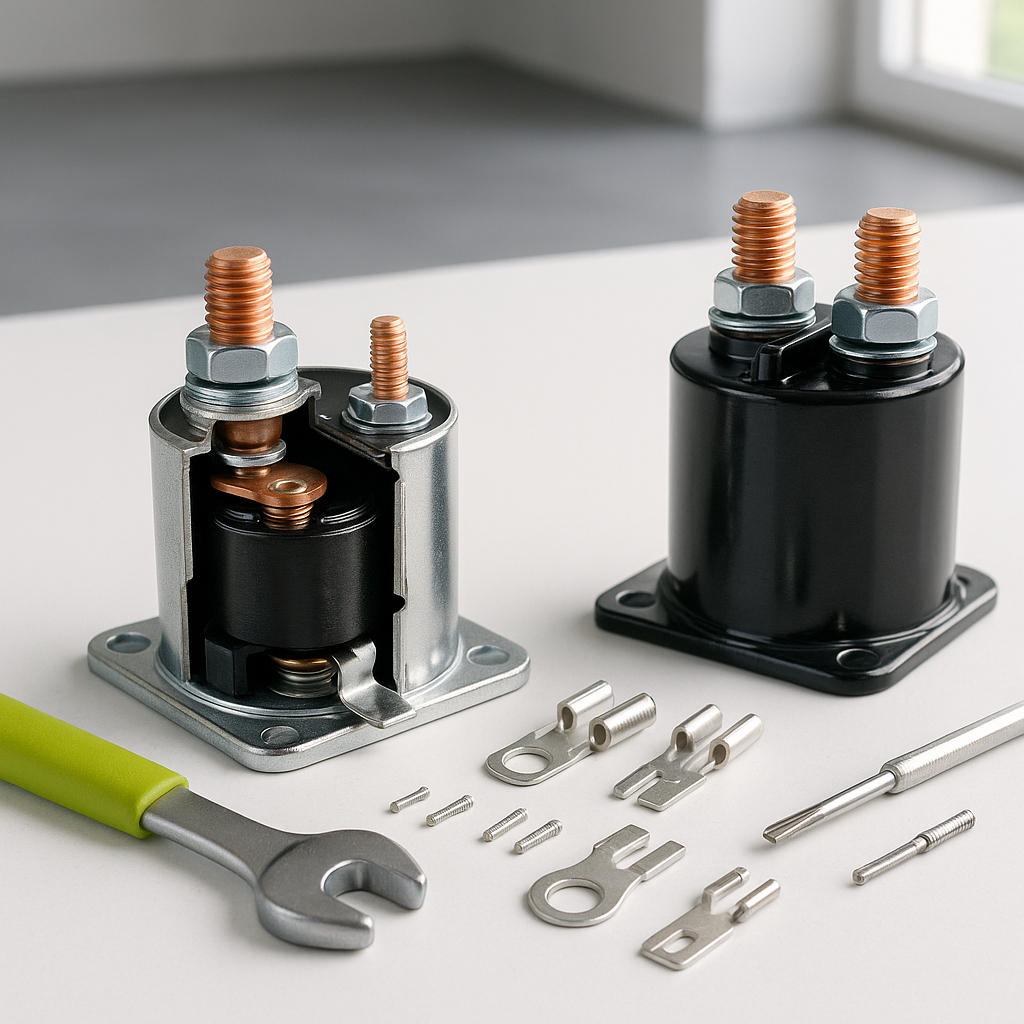
Once you've confirmed through testing that your golf cart solenoid has failed, replacement is a straightforward job that most owners can handle at home with basic hand tools. The solenoid is essentially an electrically controlled switch that connects your battery pack to the motor circuit when you press the accelerator. When it fails, the cart is dead — no click, no movement, nothing. Replacing it takes patience and attention to detail, but it's not complicated if you work methodically.
Safety First: Disconnect and Discharge
Before you touch any wiring, disconnect the main negative battery cable from your battery pack. On an electric golf cart, the voltage stored in the batteries can cause serious injury or damage if you accidentally short something out. Even with the key out, the batteries hold a live charge. After disconnecting the negative cable, wait a few minutes before working near any terminals. If your cart has a tow/run switch, flip it to tow mode as well — this opens the main circuit and adds another layer of protection.
Locate and Label Every Wire
The solenoid typically sits near the motor controller, often mounted to a bracket in the battery compartment area. Before you remove a single terminal, take several clear photos of the wiring from multiple angles. Solenoids have at least four terminals: two large posts that carry the main battery-to-motor current, and two smaller terminals that connect to the control circuit (key switch, accelerator, and related wiring). Label each wire with masking tape and a marker — large post connections are especially important to get back in the right orientation. Getting these reversed can damage your controller or motor.
Remove the Old Solenoid
Loosen and remove the large gauge cables from the main posts first, then disconnect the small control wires. Note the order and position of any washers, lock washers, or spacers on the posts — these matter for a solid connection. Once all wiring is free, unbolt the solenoid from its mounting bracket. Solenoids are usually held in place by two or four bolts. Keep the hardware organized because you'll often reuse the same bolts with the new unit.
Verify the Replacement Is the Right Type
Golf cart solenoids are not all the same. The two primary differences are voltage rating and the number of terminals. Make sure the replacement matches the voltage of your battery system — using a solenoid rated for a lower voltage than your pack delivers is a reliability and safety issue. Also confirm whether your cart uses a two-terminal or four-terminal solenoid design, as the internal wiring logic differs between them. When in doubt, cross-reference the part number stamped on your old solenoid before ordering.
Install the New Solenoid
Mount the new solenoid to the bracket in the same orientation as the old one. Torque the mounting bolts snugly but don't overtighten — the housing is often a resin or metal casting that can crack. Reconnect the small control wires first, matching your labels and photos exactly. Then connect the large gauge cables to the main posts, again following your photos to ensure correct polarity. Make sure every terminal is clean and tight. A loose large-gauge connection at the solenoid is a common cause of heat buildup, arcing, and premature failure of the new unit — if the old cable ends look corroded or pitted, clean them with a wire brush before reinstalling.
Reconnect the Battery and Test
Once all connections are secure, reconnect the main negative battery cable, flip the tow/run switch back to run if applicable, and insert the key. When you press the accelerator slightly, you should hear a clean, solid click from the solenoid — that's the electromagnetic coil pulling the internal contacts together. If the cart moves normally, you're done. If you hear no click, double-check your small control wire connections. If you hear a click but the cart still doesn't move, the issue may be upstream or downstream of the solenoid — worth checking battery voltage and controller function before assuming the new solenoid is defective.
Replacing a solenoid is one of those repairs that looks intimidating on paper but goes smoothly when you slow down, label everything, and don't skip the safety steps. Most experienced owners can complete the job in under an hour. The bigger risk isn't the work itself — it's rushing through the wiring without a clear record of what goes where.


