Golf cart brake noise is one of those problems owners often ignore far too long. It starts as an occasional squeal, then becomes a persistent grind, and before long the cart is taking twice the distance to stop. Unlike a car, golf carts don't have dashboard warning lights for brake wear — the sound is your only early warning system. Learning to read what different noises mean can save you from a much more expensive repair down the road.
Squealing: The Most Common Golf Cart Brake Noise
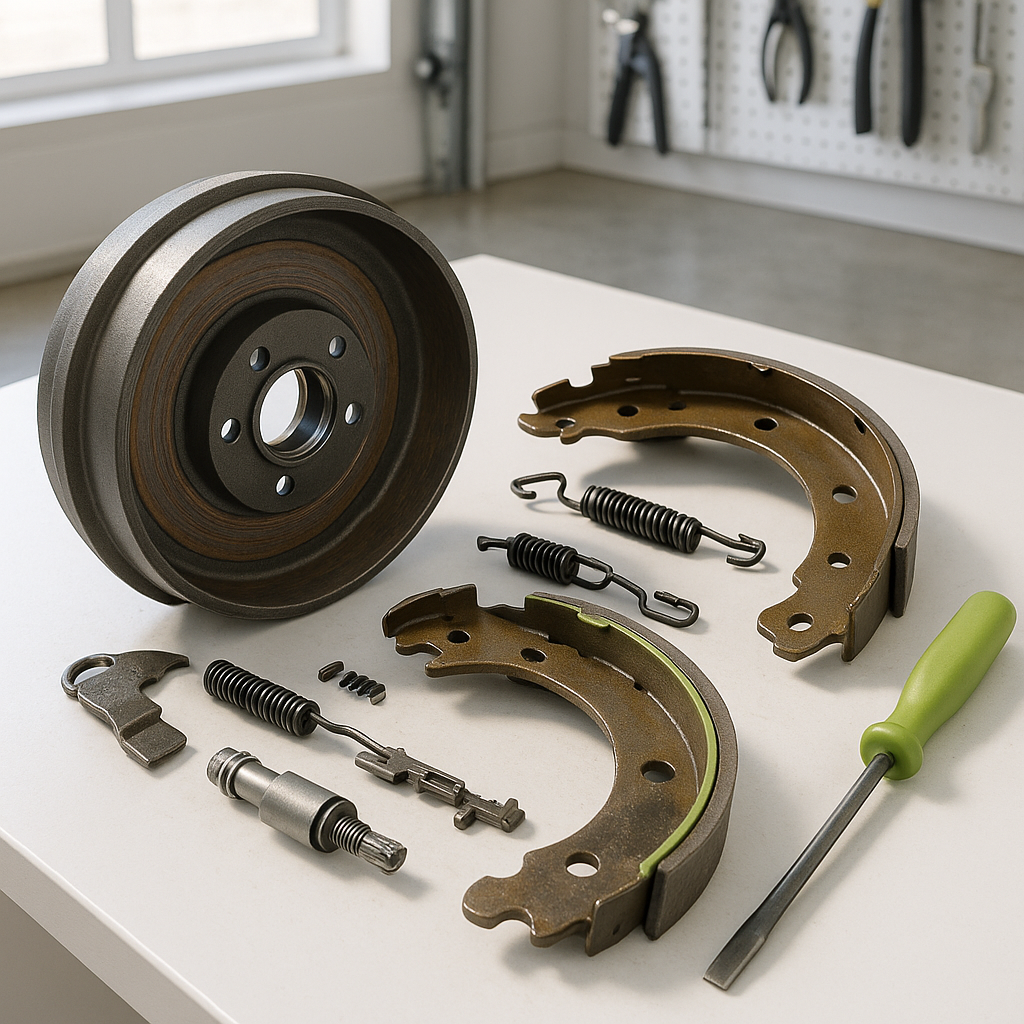
High-pitched squealing during or after braking is usually a friction issue. On drum brake systems — which most golf carts use — this often means the brake shoes have worn down to the point where the metal backing is making intermittent contact with the drum. It can also happen on lightly used carts where the drum surface has developed a layer of surface rust from sitting idle. A rust squeal typically goes away after a few brake applications; if it persists, the shoes or drum surface deserve a closer look. Contamination from grease or oil on the shoe lining is another common culprit — the lining material glazes over and loses its grip, causing it to chatter and squeal under pressure rather than bite cleanly.
Grinding: Don't Ignore This One
A grinding noise — especially one you can feel through the brake pedal — almost always means metal-on-metal contact. On drum brakes, this usually means the brake shoe lining has worn through completely and the metal shoe itself is dragging on the drum. Left unchecked, this will score and groove the drum surface, turning a simple shoe replacement into a full drum replacement. If the grinding only happens at low speeds or while rolling without the brake applied, check whether the brake shoes are dragging on the drum due to a misadjusted cable, a stuck wheel cylinder, or shoes that are set too tight. Dragging brakes cause heat buildup that accelerates wear and can warp drums over time.
Clicking or Popping Sounds
Clicking sounds that occur when you press or release the brake pedal are usually mechanical rather than friction-related. The most common sources are a loose brake cable that's developed slack and is jumping in its housing or ferrule, worn return springs that aren't seating properly after each application, or a brake pedal pivot that's dry and needs lubrication. On rear drum systems, a clicking that coincides with wheel rotation — rather than with pedal input — can indicate a small piece of debris caught between the shoe and drum, or a loose shoe adjuster that's rattling inside the drum.
How to Check the Obvious Stuff First
Before pulling drums or disassembling anything, do a quick walk-around inspection. Look at the brake cable from the pedal all the way to each rear wheel — check for fraying, kinking, rust, or sections where the cable has jumped out of its guides. A frayed or corroded cable can bind unevenly, causing one shoe to drag while the other releases freely, which creates both noise and uneven stopping. At the wheel, check that the brake drum is secure and isn't wobbling on the hub. Spin each rear wheel by hand with the cart in neutral — it should spin with minimal resistance. Noticeable drag on one side points to a shoe adjustment or cable tension problem on that corner.
When to Pull the Drum
If the noise persists after checking cables and adjustments, it's time to pull the drum and inspect what's inside. With the cart safely supported, remove the wheel, then the drum. Look at the shoe lining thickness — if it's worn thin, uneven across its width, or glazed and shiny, replacement is the right call. Inspect the drum surface for deep scoring, hard spots (small shiny areas), or an uneven ridge around the outer edge where the shoe doesn't contact. A lightly rusted drum can often be cleaned up and reused; a deeply scored or cracked drum should be replaced. While the drum is off, check the wheel cylinder for signs of leakage if your cart has hydraulic brakes, or inspect the adjuster mechanism for seizure on cable-operated systems.
After Any Brake Work: Seat and Test Properly
New brake shoes need to be bedded in — the lining surface has to conform to the drum contour before it provides full, even braking. After reassembly and cable adjustment, drive the cart at a slow, controlled speed and apply the brakes firmly several times to generate heat and seat the surfaces. Some squeal during the first several stops is normal with new linings. If noise continues well beyond the initial break-in period, or if the pedal feels different than expected, re-inspect your adjustment before assuming the parts are defective. Most post-repair brake noise comes down to adjustment errors or contamination from handling, not bad parts.
Brake noise on a golf cart is almost never a reason to keep driving and hope it goes away — it's a mechanical message that something is wearing, rubbing, or loose. The earlier you investigate, the simpler and cheaper the fix will be. A worn cable or a glazed shoe caught early is an afternoon job; a scored drum and damaged hardware caught late is a much bigger one.