Battery terminal corrosion is one of the most common — and most overlooked — causes of reduced performance in golf carts. That white, greenish, or bluish crust building up around your battery posts isn't just cosmetic. It's resistance, and resistance means your cart isn't getting full power from the battery pack, your charger isn't charging efficiently, and over time you're shortening the life of your batteries. The good news: cleaning and maintaining battery terminals is a straightforward job you can do at home with basic supplies, and doing it regularly is some of the cheapest preventive maintenance you can perform.
What You'll Need Before You Start
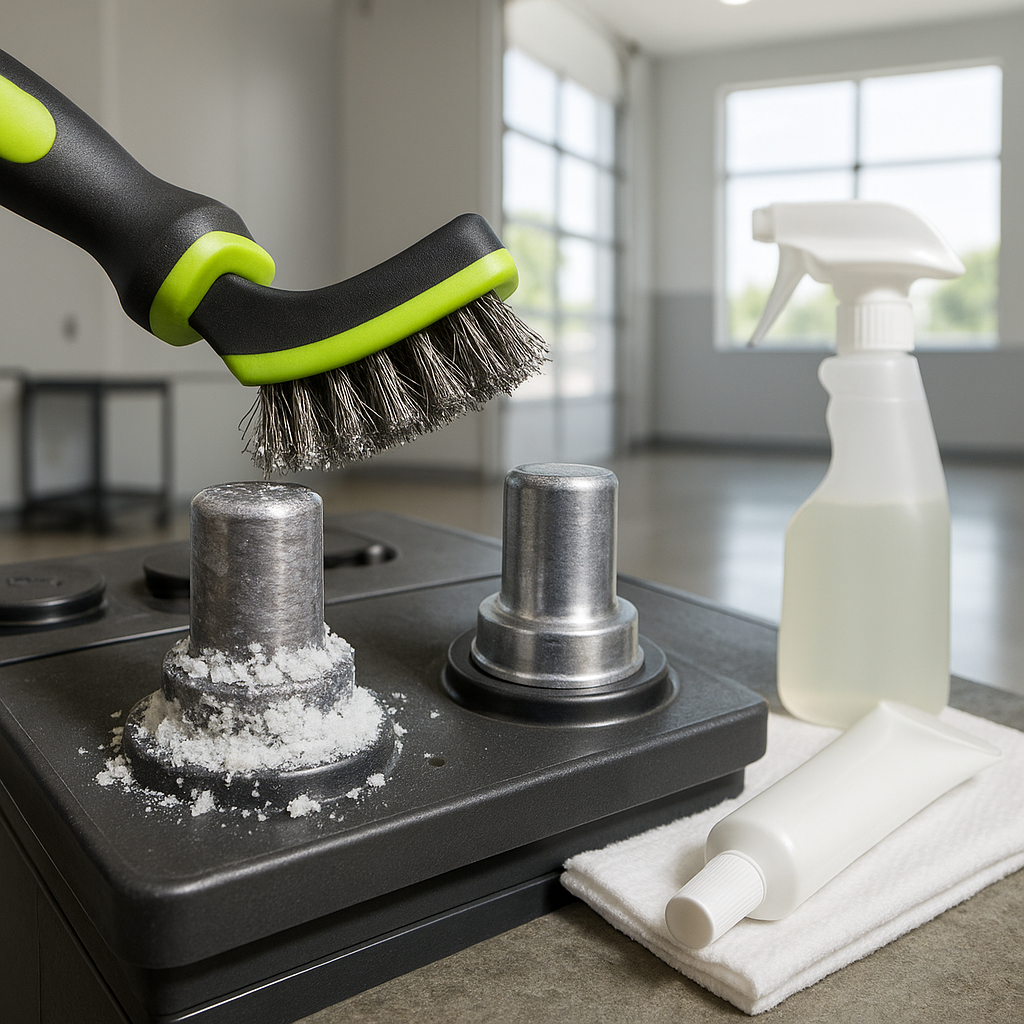
Gather everything before you open the battery compartment. You'll need a pair of rubber gloves and safety glasses — battery acid and corrosion byproducts are caustic, and this is non-negotiable. Grab a stiff-bristled brush (an old toothbrush or a dedicated battery terminal brush works well), a box-end wrench or socket that fits your terminal bolts, a spray bottle or small container, baking soda, water, and clean rags or paper towels. Terminal anti-corrosion spray or felt terminal washers are worth having on hand for the finish step. If your terminal connections are the bolt-clamp style common on most golf cart battery cables, a standard wrench set covers you.
Safety First: Disconnect in the Right Order
Before touching anything, turn the cart's key to the off position and engage the parking brake. Open the battery compartment and take a moment to look at the layout. On most golf carts, the battery pack is wired in series, and you want to avoid accidentally bridging terminals with a tool. Start by disconnecting the negative cable first — that's the black cable, usually marked with a minus sign. Work your way through the pack methodically. If you're not sure of the wiring sequence, take a photo before you disconnect anything. That photo will be your reference when reconnecting. Keep metal tools away from the tops of adjacent batteries to prevent accidental short circuits.
Cleaning the Terminals and Cable Ends
Mix a solution of baking soda and warm water — a few tablespoons of baking soda to a cup of water is a common ratio. This neutralizes battery acid residue. Apply it directly to the corroded terminals and cable ends using your brush or a rag. You'll often see the solution fizz and bubble where active corrosion is present — that's it working. Scrub the post and the inside of the cable clamp or ring terminal thoroughly until the metal is visibly clean. For heavy buildup, a dedicated battery terminal brush (the kind with wire bristles shaped to fit around the post) makes this much faster. Rinse with clean water, then dry everything thoroughly with rags. Don't let water sit in the battery compartment.
Inspect While You Have Everything Apart
With the terminals clean, this is the right moment to inspect everything closely. Look at each cable end for cracking, fraying, or corrosion that extends back under the insulation — corrosion that has wicked up inside the cable sheathing means the cable should be replaced, not just cleaned. Check the battery posts themselves for cracks or damage. Look at the battery cases for swelling, which can indicate overcharging or a failing cell. If the bolt or nut on a clamp-style terminal is stripped or won't torque down properly, replace the hardware. A loose connection is just as problematic as a corroded one — it causes heat, voltage drop, and accelerated corrosion right back where you started.
Reconnecting and Protecting the Terminals
Reconnect in the reverse order from how you disconnected — positive cables first, then negative last. Snug each connection down firmly. You're not trying to crush the battery post, but the connection needs to be mechanically solid with no movement when you wiggle the cable. Once everything is reconnected, apply a thin coat of terminal protection spray or petroleum jelly (plain Vaseline works) to each post and cable end. This creates a moisture barrier that dramatically slows future corrosion. Felt anti-corrosion washers placed around the post before reconnecting the cable are another effective option. Either approach extends the time between cleanings noticeably.
How Often Should You Do This?
For most golf cart owners who ride regularly, inspecting terminals every one to two months and cleaning them as needed is a reasonable schedule. Carts stored in humid environments or used near saltwater will need more frequent attention. A good habit is to do a quick visual check every time you add water to flooded lead-acid batteries — you're already opening the compartment anyway. If you're seeing heavy corrosion build up faster than expected, it can indicate a battery that's off-gassing excessively, which is worth investigating further. Consistent maintenance here isn't just about clean metal — it directly affects how well your batteries charge, how far you can travel, and how long the pack lasts before it needs to be replaced.