Golf cart floor mats and liners are one of the most overlooked upgrades you can make to an aging cart. Beyond aesthetics, a good floor covering protects the floor pan from moisture, mud, and foot traffic wear — all of which can lead to rust on steel pans or cracking on composite ones. Whether you're replacing a worn OEM mat or installing an aftermarket liner for the first time, the process is straightforward. The key is taking your time on fitment and surface prep before anything else.
What You'll Need Before You Start
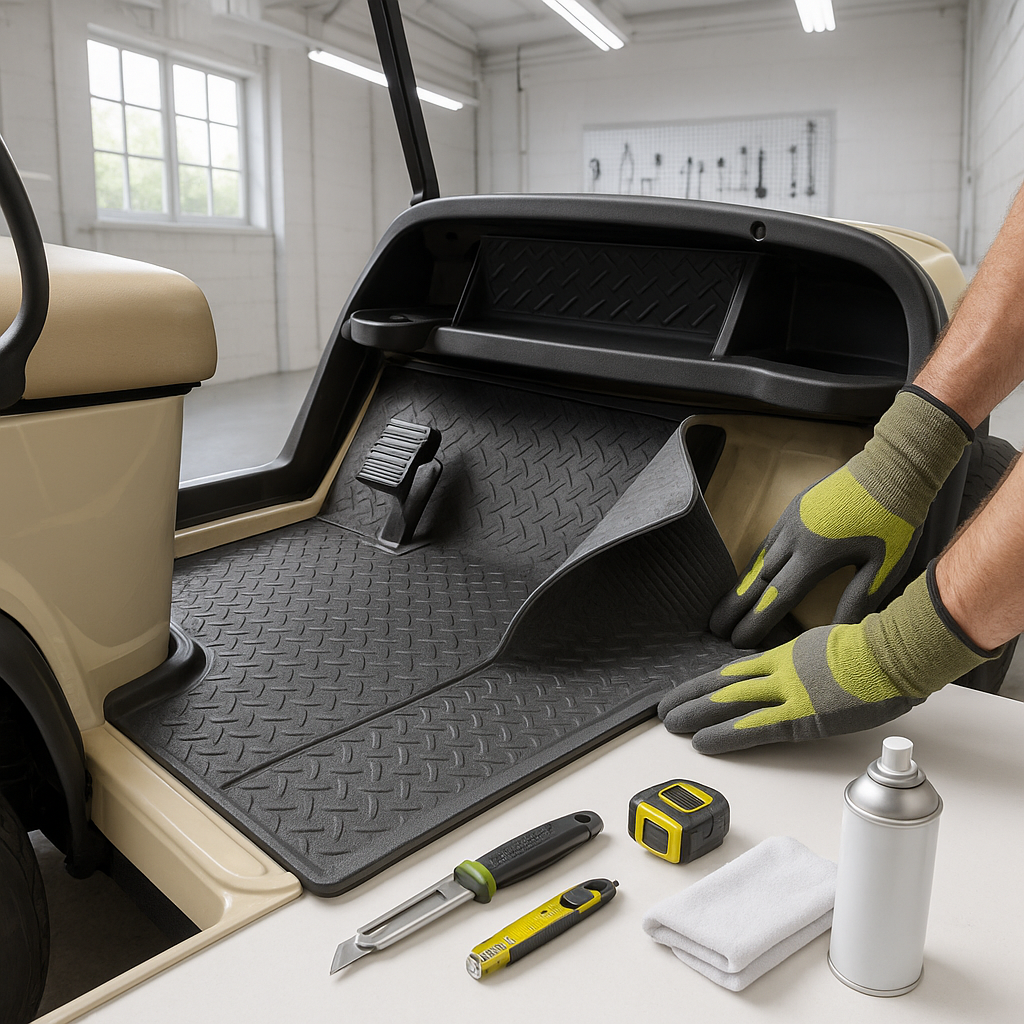
Most floor mat installations don't require any special tools. A stiff-bristle brush, a vacuum, a utility knife or sharp scissors, and a clean rag are usually enough. If you're installing a mat that uses adhesive backing or you're adding carpet over a bare floor pan, you'll also want a mild degreaser and some time for the surface to fully dry. Rushing the prep is the most common reason mats lift at the edges or don't lie flat.
Step 1: Remove the Old Mat or Liner
Pull out the existing mat and set it aside. On most carts, floor mats aren't fastened — they lay in place and are held by the foot pedals and seat base. If yours has been in place for years, it may be stuck down by compressed dirt or light adhesive. Peel it up carefully and vacuum or brush out any debris underneath. Check the floor pan for rust, cracks, or soft spots while you have clear access — this is a good time to address any issues before covering them back up.
Step 2: Clean and Dry the Floor Pan Thoroughly
This step matters more than most people expect. Any moisture, dirt, or oil left on the floor pan will cause premature mat failure and can accelerate rust on steel surfaces. Wipe down the entire floor with a mild degreaser if needed, then let it dry completely — don't rush this with a heat gun on composite floors. Once dry, do a final wipe with a clean cloth. A clean, dry surface gives you the flattest, most secure final result.
Step 3: Test Fit Before Final Installation
Lay the new mat in place without committing to any adhesive or fasteners first. Check how it sits around the pedal cutouts, along the edges, and up any toe kick areas. Most aftermarket mats are designed to fit a range of cart models, so you may need to trim to get clean edges. Use the old mat as a rough template if you need a starting point for cuts. A utility knife and a straight edge give you a cleaner cut than scissors on thicker rubber liners.
Step 4: Trim for a Clean Fit
Mark any areas that need trimming with a grease pencil or masking tape and cut gradually — it's easy to take more off but impossible to add material back. Pay particular attention to the pedal openings. A mat that bunches around the accelerator or brake pedal is a genuine safety hazard, not just a cosmetic issue. The mat should lie completely flat with no lifting edges anywhere underfoot. Trim, refit, trim again if needed until it lays true.
Step 5: Secure the Mat and Reinstall Any Hardware
Many floor mats sit in place without any fasteners once trimmed properly — the weight of passengers and the seat frame keeps them down. If your mat has grommets or mounting holes, reinstall any factory screws or clips that hold it in position. Some installers add a few strips of double-sided carpet tape along the edges in high-movement areas to prevent curling over time, particularly at the front toe kick. Avoid using tape under the area of heavy foot traffic as it tends to fail under that load anyway. Once the mat is secured, reinstall the foot pedal cover or any trim pieces you removed.
Maintenance Tips to Make It Last
Floor mats take a beating — mud, water, UV exposure if you're outdoors, and constant foot traffic. Rubber and vinyl liners are the easiest to maintain: hose them down or wipe with a damp cloth and mild soap. Carpet mats need more attention — a stiff brush and occasional deep cleaning will keep them from matting down and holding odors. If you're in a wet climate or frequently on muddy terrain, a full rubber liner is generally a better long-term choice than carpet, even if carpet looks more finished. Either way, pulling the mat out once or twice a season to clean both the mat and the floor pan underneath is the best way to prevent rust and keep the interior looking sharp.