A golf cart that tracks straight during normal driving but pulls noticeably to one side the moment you apply the brakes is telling you something specific: the stopping force isn't being applied equally to both rear wheels. Unlike a car with four-wheel braking, most golf carts brake exclusively at the rear axle, which makes left-right imbalance both more obvious and easier to isolate. The good news is that the diagnostic path is fairly straightforward if you work through it systematically.
Start With a Quick Visual Inspection
Before touching anything mechanical, look at both rear wheels from behind the cart while it's on flat ground. You're looking for obvious asymmetry — one wheel sitting differently, uneven tire wear across the two sides, or any visible gap difference between the wheel and the drum housing. Then crouch down and peer in at each brake drum assembly if your cart design allows it. Any obvious oil staining, rust buildup, or debris contamination on one side and not the other is a useful early clue. Also check that both rear tires are inflated to the same pressure. A significant pressure difference between sides won't cause brake pull on its own, but it can exaggerate an imbalance that's already there.
Check the Brake Cable or Cables
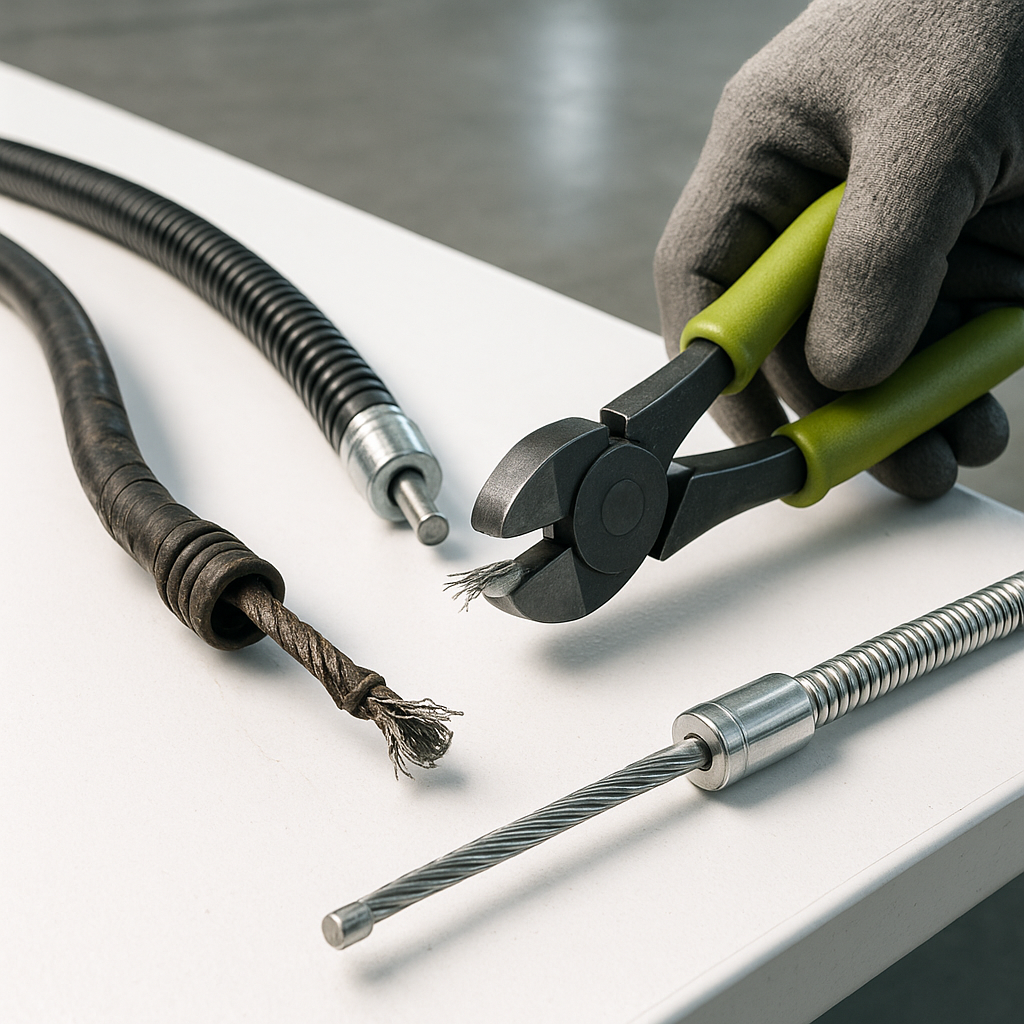
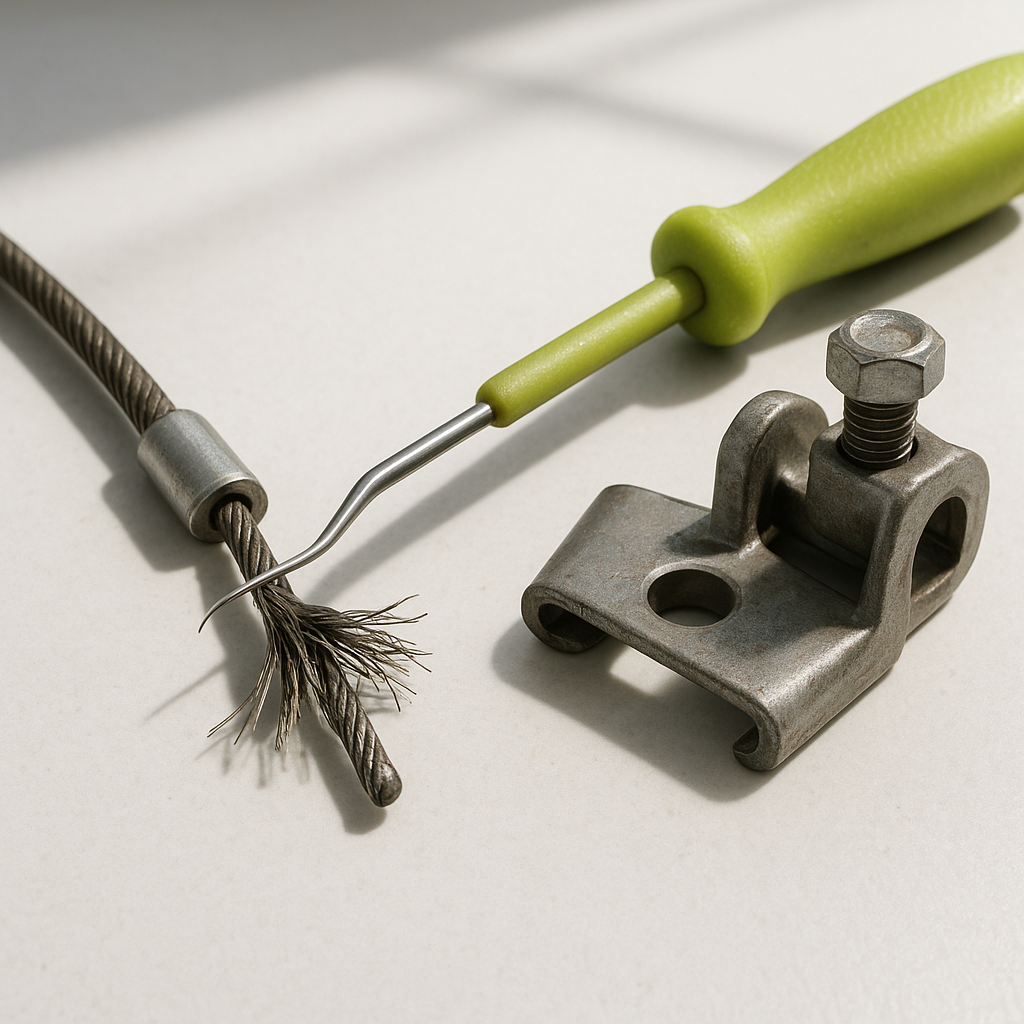
Most golf carts use a mechanical brake system — either a single cable that splits to both wheels or two separate cables running independently to each side. This cable arrangement is one of the most common sources of one-sided pull. If one cable has stretched, frayed, or is routed through a bent or kinked section of housing, it won't transmit the same force as the other side. Disconnect the cable(s) at the wheel end and compare how freely each one moves through its housing. Both should feel similarly smooth and consistent. Stiff movement on one side, or visible kinking and corrosion in the cable housing, points to that cable as the problem. Also check the cable anchor and equalizer hardware (the hardware that splits force between both sides) — if it's seized or sitting off-center, one side will always receive more tension than the other.
Inspect the Brake Drums and Shoes
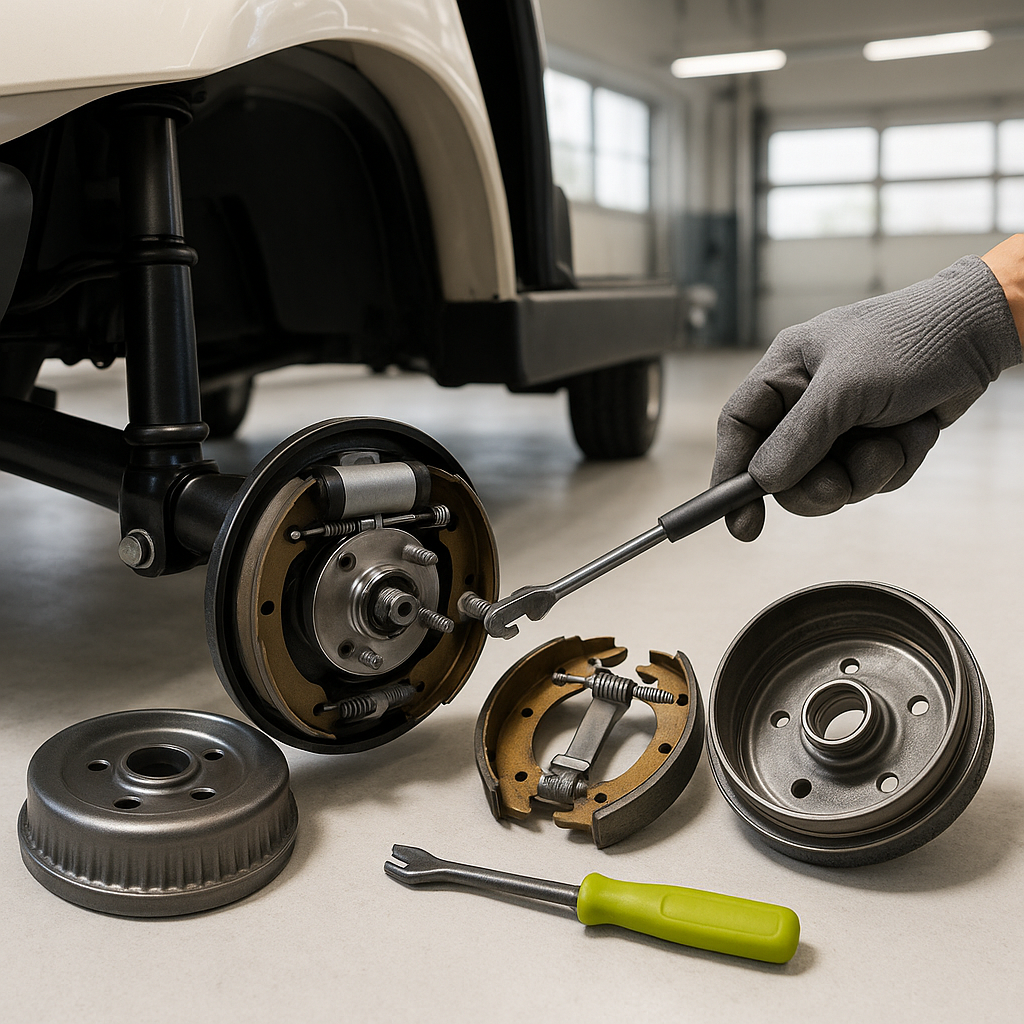
With the wheels removed, take a close look at the drum interior on each side. Scoring, deep grooves, heat discoloration, or a glazed surface on one drum but not the other is a sign that drum has been working harder — or that contamination has been reducing friction on the opposite side. Check the brake shoes on both sides for even thickness and even wear patterns. Shoes that have worn unevenly across their width or are significantly thinner on one side compared to the other suggest either a stuck adjuster or a wheel cylinder issue if your cart uses hydraulic assist. Any oil or grease contamination on the shoe lining — from a leaking axle seal, for example — will dramatically reduce braking on that side and is a very common cause of pull.
Look for a Seized or Sticky Brake Assembly
A brake mechanism that doesn't fully release after you let off the pedal creates a dragging condition on that wheel. To check for this, jack up the rear of the cart safely and support it on stands. Spin each rear wheel by hand with the brake released. Both wheels should spin freely with similar resistance. If one wheel is noticeably harder to turn or feels like it's dragging, that side's brake hardware isn't releasing completely. This can happen when the return spring on the shoe is weak or broken, when the pivot hardware is corroded and stiff, or when the adjuster has been set too tight. A dragging brake doesn't just cause pull — it generates heat and accelerates wear on that side, so it's worth addressing promptly.
Evaluate Wheel Bearing Condition
While you have the wheels off the ground, grab each rear wheel at the 9 and 3 o'clock positions and try to rock it. Then try at 12 and 6. Any looseness or clunking suggests a worn wheel bearing. A failing bearing changes the geometry of how that brake drum sits relative to the shoes, which can produce uneven contact and contribute to pull. This is a less common cause than cable or shoe issues, but worth ruling out before reassembling everything.
Adjust Both Sides to Match
Even if you don't find an obvious defect, it's worth checking that the brake adjustment is equal on both sides. Most drum brake systems have a star wheel adjuster that sets the gap between the shoe and the drum. If one side has been adjusted tighter than the other — whether by accident or because one side wore faster — you'll get uneven braking force. Adjust both sides to the same setting following the drum brake adjustment procedure appropriate for your cart model, which generally involves tightening the adjuster until the wheel drags slightly, then backing off a set number of clicks.
When to Replace Instead of Adjust
If you find contaminated shoes, a scored drum, a kinked cable, or a broken return spring, adjustment alone won't fix the pull. Contaminated brake shoes should always be replaced rather than cleaned — the lining material absorbs oil and grease permanently. Drums with deep grooves or heat cracks should be replaced as well, since resurfacing options are limited on most golf cart drums. When replacing components, always do both sides together. Replacing brake shoes or drums on only one side is a common mistake that resets the imbalance problem from a different direction.