If your golf cart clicks once and goes nowhere, or makes no sound at all when you press the pedal, a failed solenoid is one of the most common culprits. The solenoid is an electromagnetically activated switch that sits between your batteries and your motor controller or motor — it closes the main power circuit when you press the accelerator and opens it when you let off. When it fails, the cart is effectively dead. Replacing one is a manageable DIY job, but it requires working around high-voltage DC power, so you need to respect the process from start to finish.
Before You Start: Safety First
Golf cart battery packs carry substantial voltage and can deliver dangerous amounts of current. Before touching any wiring, disconnect the negative battery cable from your pack — or, on carts with an easy-access main disconnect, use that. Wear insulated gloves and safety glasses. Never assume a wire is safe to touch just because the key is out. Have a fire extinguisher rated for electrical fires nearby. Lay down a rubber mat to work on if your cart is stored on a concrete floor. None of this is overkill — DC battery current at these voltages can cause severe burns and arc flash in a fraction of a second.
Identify Your Solenoid
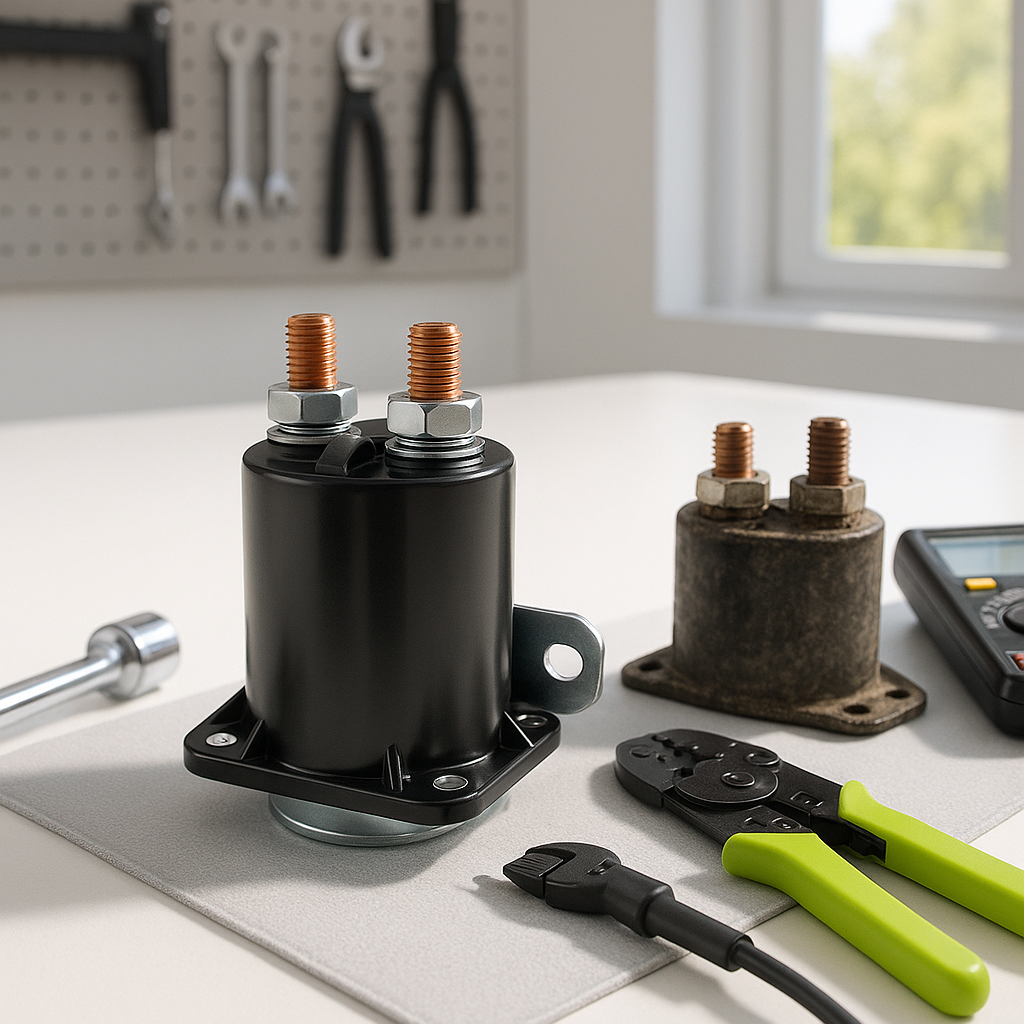
Locate the solenoid before you order a replacement. On most electric golf carts, it's mounted near the battery pack — often on the frame near the motor controller. It's typically a cylindrical or rectangular component with two large posts (the main power terminals) and two smaller terminals (the coil terminals that trigger it). Take a clear photo of the solenoid and its wiring before disconnecting anything. Note the voltage of your battery pack, the coil voltage rating stamped or labeled on the solenoid body, and whether your cart is a series-wound or AC system — all of these factors determine which replacement unit is correct for your application.
Remove the Old Solenoid
With the battery pack disconnected, label each wire attached to the solenoid with tape and a marker — or rely on your photos. The two large-gauge cables connect to the main power posts; the two smaller wires connect to the coil terminals. Use appropriately sized wrenches to remove the hardware from the main terminals first, carefully setting the cable lugs aside so they don't contact anything. Then disconnect the smaller coil wires. Once all wires are free, the solenoid itself is usually held to the cart frame with one or two bolts — remove those and pull the unit out. Inspect the mounting surface for corrosion and clean it before installing the new one.
Install the New Solenoid
Mount the new solenoid in the same orientation as the old one. Bolt it to the frame snugly — it should be secure but you don't need to over-torque a mounting bracket. Reconnect the small coil wires first. Polarity matters on some solenoid designs: check whether your replacement has marked terminals (often labeled with a positive symbol or a diagram). If polarity is required, match it — reversed coil wiring can damage the diode inside the solenoid on some modern units or simply prevent it from activating properly. Next, reconnect the large main power cables to their respective posts. On a properly wired cart, one large cable comes from the battery pack and the other goes to the controller or motor — keep these on the correct posts. Tighten the main terminal hardware firmly; a loose connection here will cause arcing and premature failure.
Test Before Buttoning Everything Up
Reconnect your main battery negative cable or engage your disconnect. With the key off, use a multimeter to verify voltage is present at the input side of the solenoid. Now turn the key to the on position and press the accelerator slowly — you should hear a firm click as the solenoid engages. If the cart moves normally, you're done. If you hear no click, double-check the coil wiring and verify that your key switch, run/tow switch, and forward/reverse switch are all in their correct positions — those components are all part of the coil activation circuit. A solenoid won't click if it's not receiving a complete signal from the rest of the control circuit.
Common Mistakes to Avoid
The most frequent installation error is swapping the main cable positions — it usually doesn't damage the solenoid itself but can confuse the controller logic or reverse current flow in ways that cause other problems. The second most common issue is leaving the run/tow switch in the tow position, which intentionally bypasses the solenoid and makes the new part look like a failure when it isn't. Always confirm that switch is in the run position when testing. Finally, don't skip cleaning corroded terminal hardware — old oxidized lugs with poor contact will cause the same sluggish or no-start symptoms as the bad solenoid you just replaced.
A solenoid swap is genuinely one of the more straightforward repairs on an electric golf cart once you understand the safety requirements and the basic wiring layout. Work methodically, keep your photos handy, and don't rush the reconnection step — that's where most mistakes happen. Get it right and your cart should snap back to life the moment you press the pedal.